It’s been a little over three years since The Shipment came – the boxes that held my new Myrehed Combination Shaft and Single Unit Drawloom and loom extension. Three years since I inaugurated the set-up with dragon placemats, followed by seasons wall hangings, barns, and most recently orchid bookmarks.
All this time, the ground shafts operated as a counterbalance set-up because the existing countermarche did not fit within the drawloom frame. I was okay with counterbalance, but I really missed the stability and flexibility of countermarche weaving. I dreamed of adapting the countermarche to fit the drawloom.
This week it finally happened.
I knew I wasn’t going to get this done without some help and I have to give a lot of credit to my Dear Husband. He knows I am a “hasty bear” with woodworking projects and I don’t always see how things could possibly be “that difficult”. He thinks ahead and sees challenges in my enthusiastic plans. He is more methodical – measure twice, cut once.
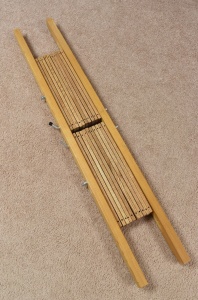
So he suggested, then stated, then insisted, that we make new jacks the shorter length rather than just cut the existing jacks shorter. He didn’t want to ruin pieces that couldn’t be replaced. I thought we could do it, but accepted his advice. Good thing.
He also said it would be next to impossible to drill the upright holes straight without a drill press. We weren’t going to buy a drill press for just one project, but we did find an affordable drill guide. Then off to the lumber store for ½” x 1 ½” wood. Home again, we measured, cut, — and lo and behold, I mismeasured one of them. Back to the lumber store for one more piece.
Next came the drilling. We had to drill a new pivot bolt hole in the countermarche frame to center the shorter jacks. Each jack needed a pivot hole in the center, two holes on either upright end for the cords, and a locking pin hole. I wanted to use the existing locking pin holes in the frame to avoid drilling into the frame more than needed.
This is where I so appreciated my husband’s insistence on making new jacks. We measured, measured again, positioned, lined up, held breath, and started drilling. I won’t show the holes; some are not very pretty. Even with the drill guide, drilling straight, centered holes on the upright edge of a ½” board is not easy! And as carefully as we measured, when all the new jacks were bolted into place, the locking pin holes did not line up close enough to get the pin through. After some rearranging and filing, the locking pins are in place.
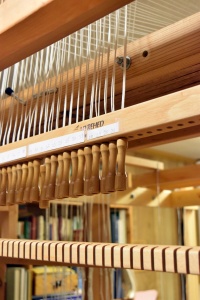
As I was lining up holes and bolts, I hoped that the shortened jacks would indeed fit between the draw bridge frame once we got it all put together. And yes, they do fit–and move freely.
Now, thanks to my Dear Husband, the countermarche sits atop the loom, under the draw bridge, awaiting new warps. My mind is working.


